
Enforcing Usage Quotas
This tutorial describes Traffic Sentinel's traffic control functionality. The example of managing peer-to-peer (P2P) traffic through usage quotas demonstrates the functionality of the controller.
Note: The traffic control functionality was added in Traffic Sentinel 4.0. If you are using an older version of Traffic Sentinel you will need to upgrade before you can use this feature.
Controller
The following diagram illustrates the different components of the Traffic Sentinel controller:
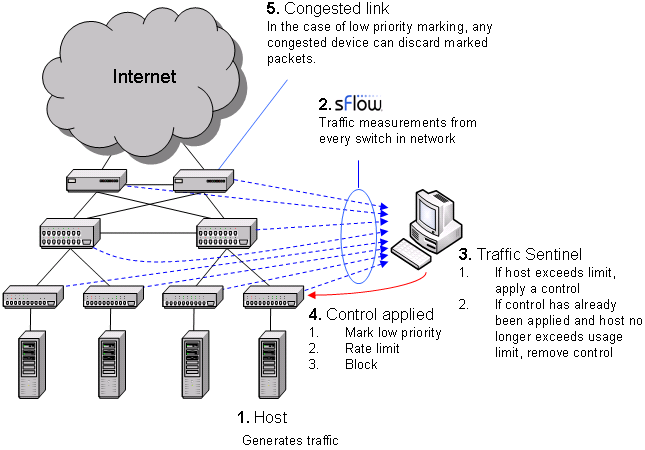
The diagram shows the sequence of actions involved in controlling traffic. The sequence form a "closed-loop control system" designed to maintain network performance by controlling large sources of traffic. In step 1, a host starts generating large amounts of traffic. In step 2, Traffic Sentinel, using the multi-vendor sFlow® standard to continuously monitor traffic throughout the network, quickly detects the increase in traffic from the host and locates the host to the switch port connecting it to the network. In step 3, Traffic Sentinel checks the host's traffic levels against pre-set limits (or quotas) and applies a control if the host is over quota. In step 4, the access switch connecting the host to the network is reconfigured to apply the selected control. Step 5 only applies when using priority controls. A priority control consists of two parts; the first part involves marking packets from the host as low priority at the access switch and the second part occurs when congestion occurs elsewhere in the network and the congested device selectively drops the marked packets, reducing the bandwidth consumed by the marked host. Finally, Traffic Sentinel continues to monitor traffic and when it detects that the traffic from a host is back within acceptable limits, it removes the control.
Typically, a small number of hosts are responsible for the majority of the traffic on the network: identifying those hosts and applying controls to their traffic prevents them from unfair dominating, ensuring fair access to all users.
Three types of control are currently supported:
- Priority, uses quality of service (QoS) settings in the switch to mark packets from the target host as low priority. Marking is performed using Differentiated Services Code Point (DSCP). For packet marking to have an effect, devices in the network need to be configured with a less than best-effort, lower-effort or scavenger priority class (see RFC 3662: A Lower Effort Per-Domain Behavior (PDB) for Differentiated Services and QBone Scavenger Service (QBSS)).
- Rate-limit, uses rate limiting in the switch to reduce the amount of traffic from the target host.
- Block, disables the switch port connecting the host to the network.
The Traffic Sentinel controller combines the traffic monitoring and control capabilities of existing network switches to provide effective network-wide traffic control. There are a number of benefits to this approach:
- Scalable, controls are distributed among the large number of access switches in the network.
- Low cost, uses capabilities of devices already in the network; no addtional hardware required.
- High performance, uses mechanisms implemented in switch ASICs that run at wire speed.
The visibility and control that Traffic Sentinel provides is an important tool for containing network costs. Traffic analysis identifies wasteful traffic that can be eliminated from the network and the control functionality ensures quality of service during peak period. Combined, these two capabilities help avoid costly and uneccessary upgrades and provide information to target network spending to areas where it will be most effective.
Managing P2P traffic
Managing P2P traffic provides some unique challenges:
- P2P protocols make use of very large numbers of connections in order to quickly transfer data. The large number of connections allows a P2P user to obtain a disproportionate amount of network bandwidth; even a small number of P2P users (less than 0.5% of users) can consume over 90% of the network bandwidth.
- P2P protocols (and users) are very good at getting through access control lists (acl) by using non-standard ports, using port 80 (web) etc. Trying to maintain an effective filter to identify P2P traffic is a challenge and the resulting complex rule sets consumes significant resources in the devices attempting to perform the classification.
Usage quotas have a number of attributes that make them an effective means of managing P2P activity:
- A simple usage quota is easy to maintain and enforce and encourages users to be more responsible in their use of shared resources.
- Since quota based controls are interested in the overall amount of traffic that a host generates and not the specific type of traffic, they don't encourage users to tailor P2P application setting to bypass acl rules and so their traffic is easier to monitor.
- A quota system can be implemented using standard network hardware, without the addition of a "traffic shaping" appliance that can become a bottleneck and point of failure.
Configuring Traffic Sentinel
This section provides step by step instructions for configuring Traffic Sentinel's traffic control function. The example we will be using is controlling P2P traffic on a university campus, however, the basic steps are the same regardless of the specific usage policies you wish to enforce.
1. Configure Zones and Groups
In order to be able to manage traffic effectively, you should configure Traffic Sentinel with Zones and Groups containing the IP address space on your site (see Configuring Traffic Sentinel). This will allow you to set quotas by Zone and Group and to determine if traffic is local or off-site.
In this example, we will be setting specific policies for student accommodation and so defining a Zone that contains the address space allocated to students will make the task of managing traffic much easer.
2. Verify/Install Adaptors
Traffic Sentinel relies on adaptors to map traffic shaping policies into device specific configuration settings. The Controller>Adaptors page is used to manage adaptors. If you don't see an adaptor for your switches, or the supplied adaptor doesn't support a particular device, please contact InMon support to ask if a new adaptor is available.
Before you can start using controls you may have to make additional configuration changes to the switches in your network. Currently all the Adaptors use SSH to connect to the switches. You will need to make sure that SSH access is enabled on the switches and that SSH connections are allowed through any firewalls between Traffic Sentinel and the switches.
The priority function generally involves network-wide configuration to support the additional lower-effort or scavenger class DSCP value (a DSCP value of 8 (cs1) is typically used for less than best-effort traffic).
When using priority controls with ProCurve switches, you will need to make sure that "qos dscp-map" contains the DSCP code that you have configured on the Controller>Settings page.
When using priority controls with Juniper switches, you will need to make sure that a forwarding class named "lower-effort" is defined.
Note: The capabilities of network devices vary and not all devices are capable of implementing traffic controls.
3. Configure Device Access
The File>Configure>Edit page is used to specify username and password information for accessing devices.
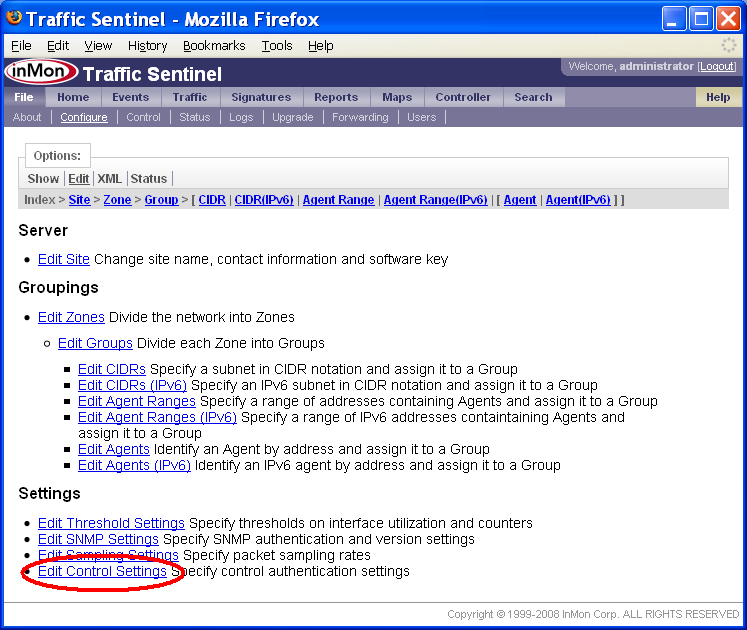
Click on the Edit Control Settings link to bring up a list of authentication settings that will be used to log into switches in order for the controller to make configuration changes.
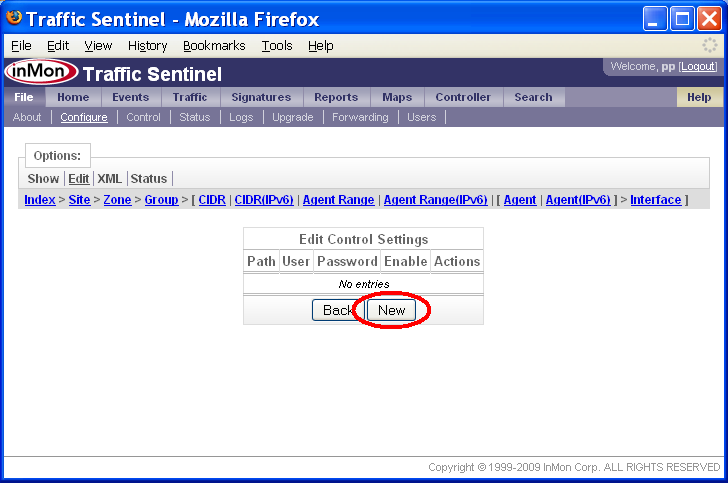
By default the list of Control Settings is empty and Traffic Sentinel will make no attempt to apply controls to devices in the network. Click on the New button to add an authentication setting.

In this case we are only going to allow switches in the Dorms zone to be reconfigured by Traffic Sentinel. The User and Password information is needed so that Traffic Sentinel can connect to switches using SSH. The Enable setting means that Traffic Sentinel is allowed to make configuration changes. Changing it to Disable would block Traffic Sentinel from making changes.
Note: You can verify that the controller can log into a switch using the File>Configure>Status page. Select a switch to see details of its configuration.
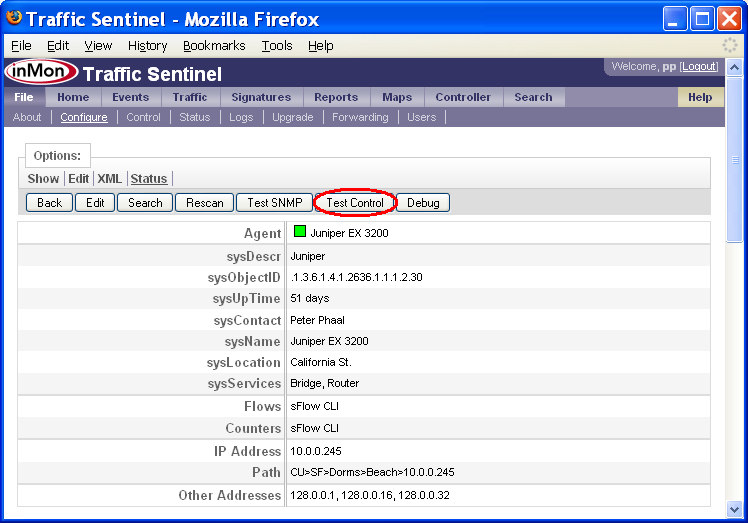
Click on the Test Control button to verify that Traffic Sentinel is able to log in to the switch (the test simply logs in and logs out without making any configuration changes).
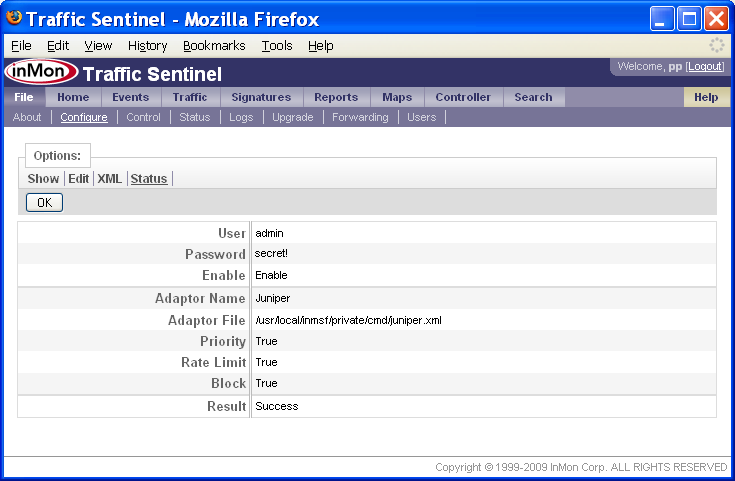
The test results confirm that the controller has an adaptor for this switch, that the adaptor supports priority, rate limit and block control actions and finally that the login was successful.
4. Configure Control Policy Settings
The Controller>Settings page is used to map control policies into specific settings:
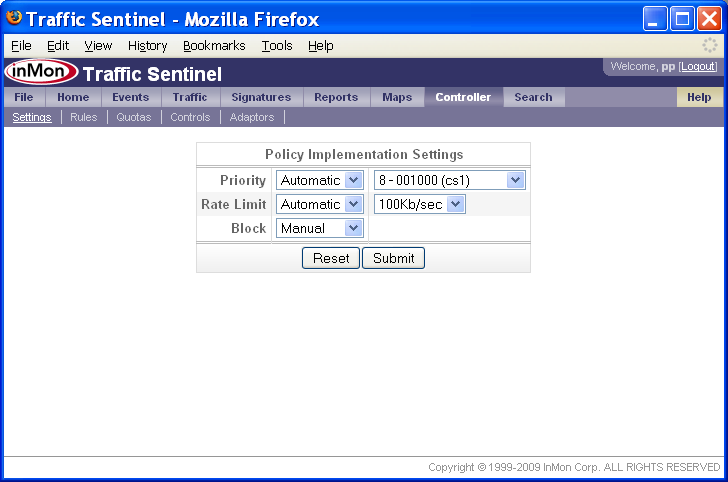
This screen shows that priority controls will be implemented automatically by marking packets with a DSCP code of 8. Rate limit controls will also be applied automatically and will throttle traffic to 100Kb/sec. Finally, block controls require manual confirmation before the port is disabled.
5. Configure Quotas
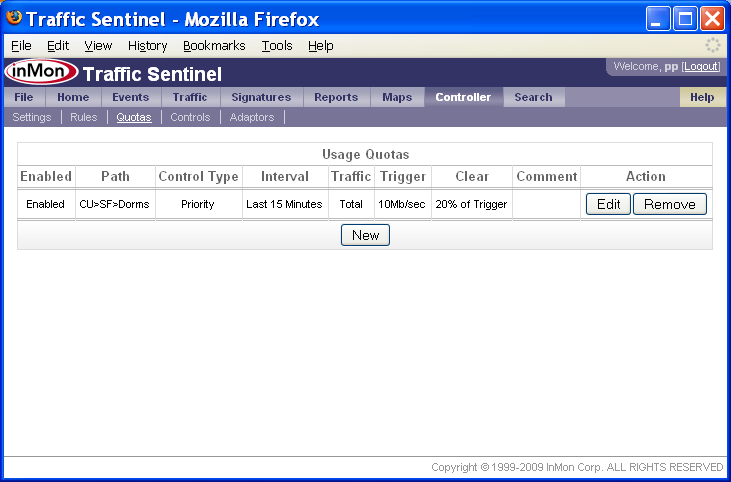
The Controller>Quotas page is used to set quotas.
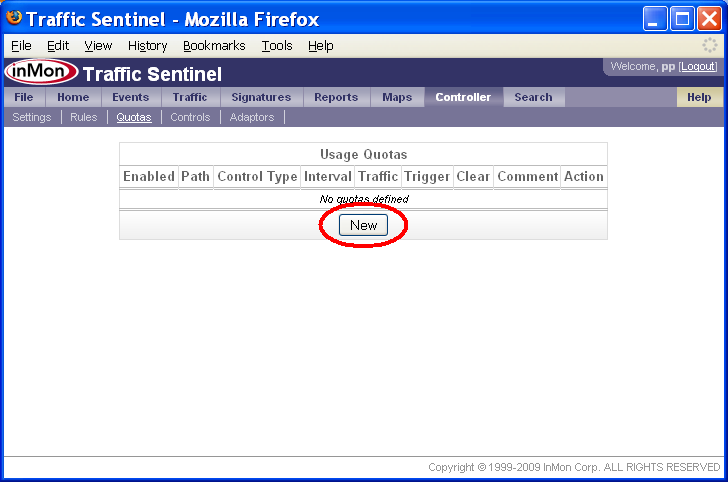
Click on the New button to add a quota to the list.
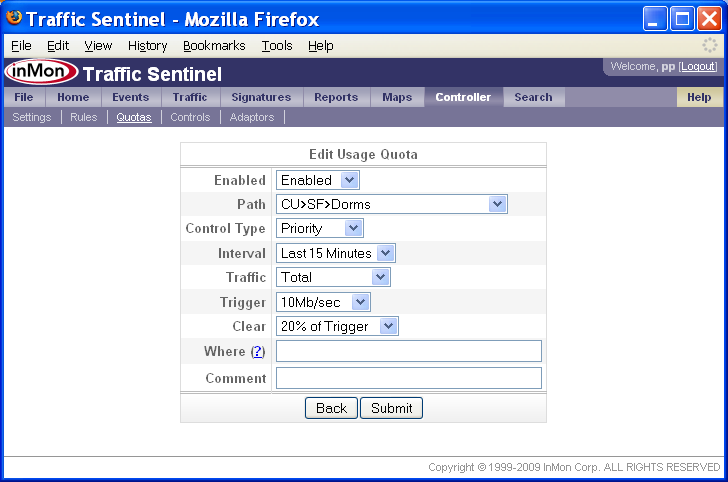
A quota is expressed as an average data rate over a specified interval. In the example above, any host in the Dorms zone, averaging over 10Mb/sec over a 15 minute interval will have a priority control applied. The 20% of Trigger setting for the Clear value specifies that the control should be removed once the host's traffic averages less than 2Mb/s for 15 minutes. Click the Submit to start enforcing the quota.
Additional quotas can be added to the list for different groups of users or for different types of traffic.
6. Monitor Controls
The Controller>Controls page shows all the currently active controls
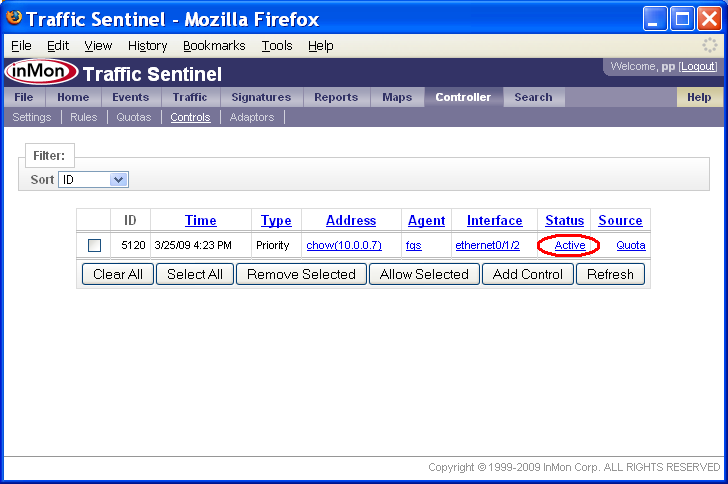
In this example, the host chow(10.0.0.7) has exceeded a quota. The host is located on interface ethernet0/1/2 on switch fgs. The status of Active indicates that the control has been successfully configured on the switch. Clicking on the status link displays the configuration settings that have been installed on the switch.

An ACL is created to match traffic from 10.0.0.7 and to rewrite the DSCP value. The ACL is applied to port ethernet0/1/2 on the switch.
| Related Topics |
|